
Easy DIY Burlap Wreath Tutorial | Front Door Fall Wreath
A DIY burlap wreath can easily be updated if you tire of the look, and it can be updated to change seasonally. The key is to look for colors and textures that fit your style even if it’s not in the shape or form that is traditional for a wreath.
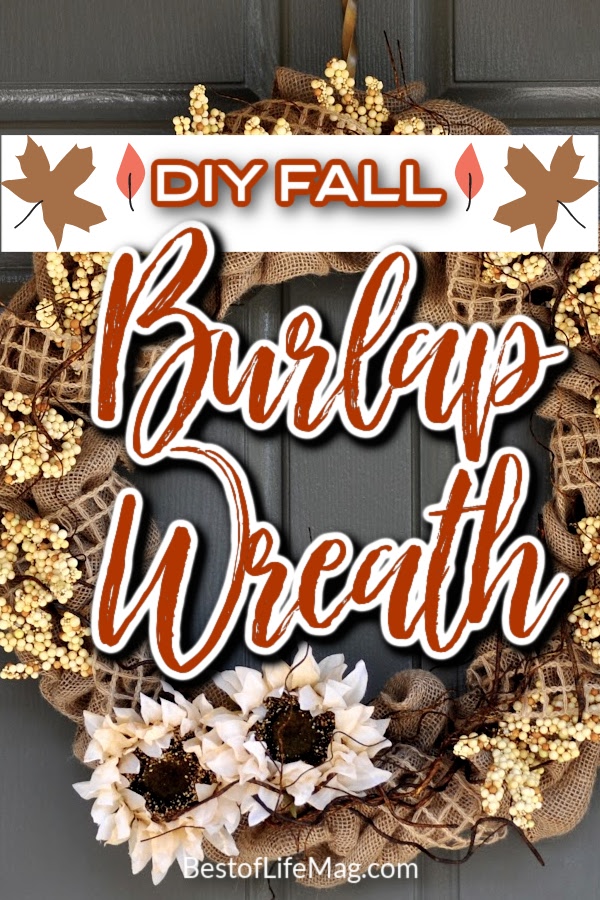
Making a DIY burlap wreath is an effortless way to freshen up your home or even your front door if you have a covered patio or live in a warmer climate. One of the features I love the most about a burlap wreath is that you can completely make it your own to match your style and taste.
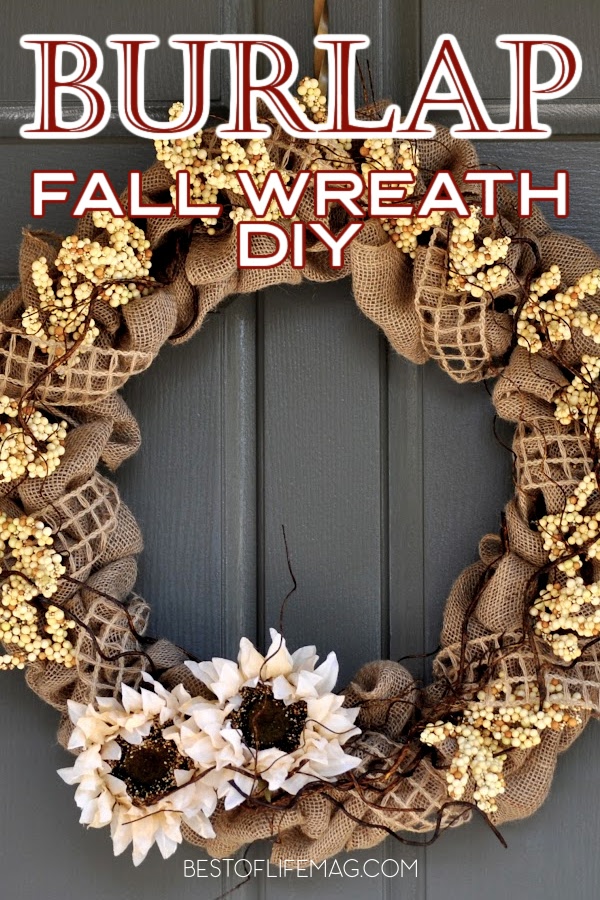
Our neutral fall DIY burlap wreath keeps your home looking chic and stylish throughout the entire season with its Restoration Hardware-inspired design. You can save money on this wreath by repurposing items that have been found at a garage sale or here in California.
We have Laura’s House Resale Store, which supports hundreds of mothers and children so they can rebuild their lives. You can find ways to make the DIY project out of scraps as well.
That is what makes DIY projects so amazing. In fact, there are so many ways to customize the wreaths to fit your own style.
DIY Burlap Wreath for Fall
1 20” wire wreath frame (wire wreath frames come in many sizes)
3 Burlap Rolls of 5.5 in x 15 ft. (Quantity of burlap depends on the size of the wreath)
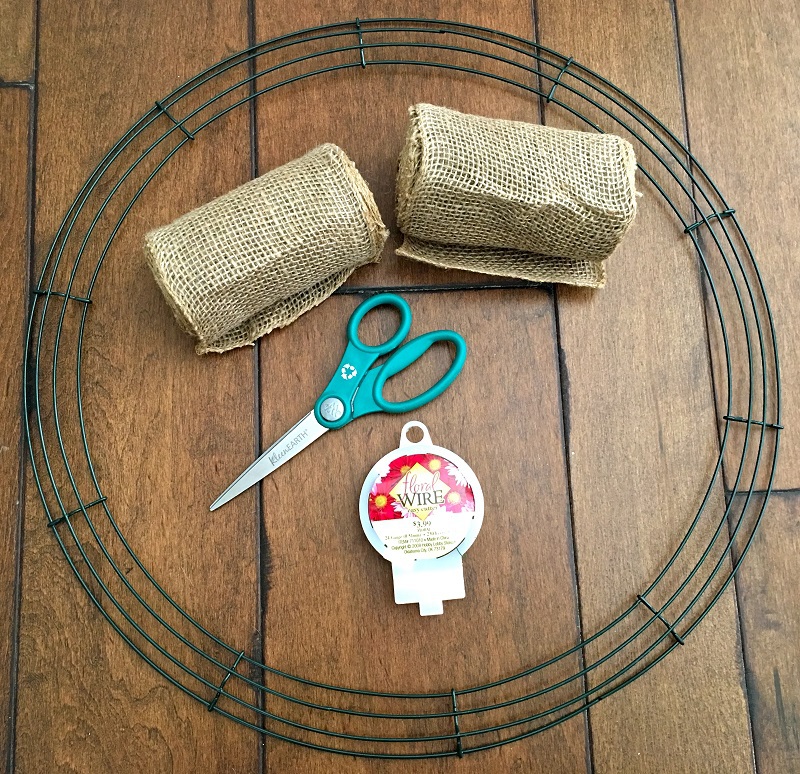
decorations, accessories, and ribbon of your choice
DIY Burlap Wreath Instructions
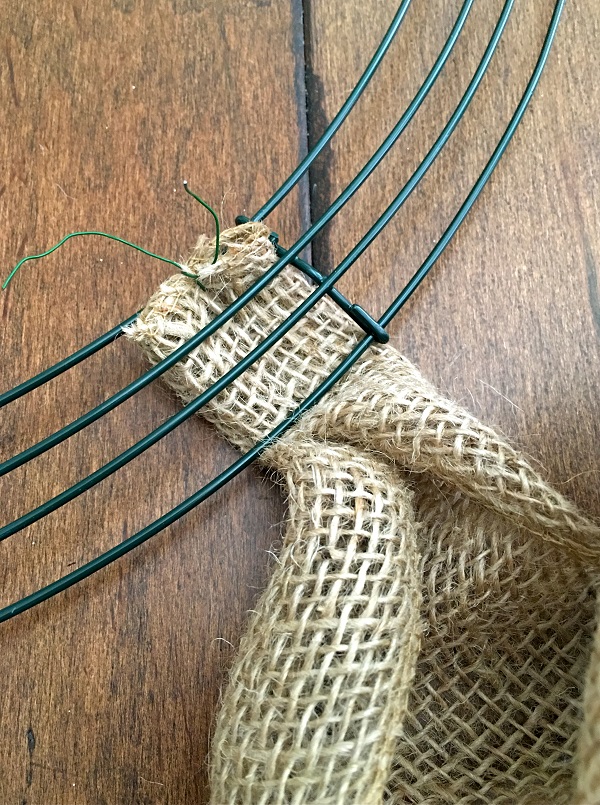
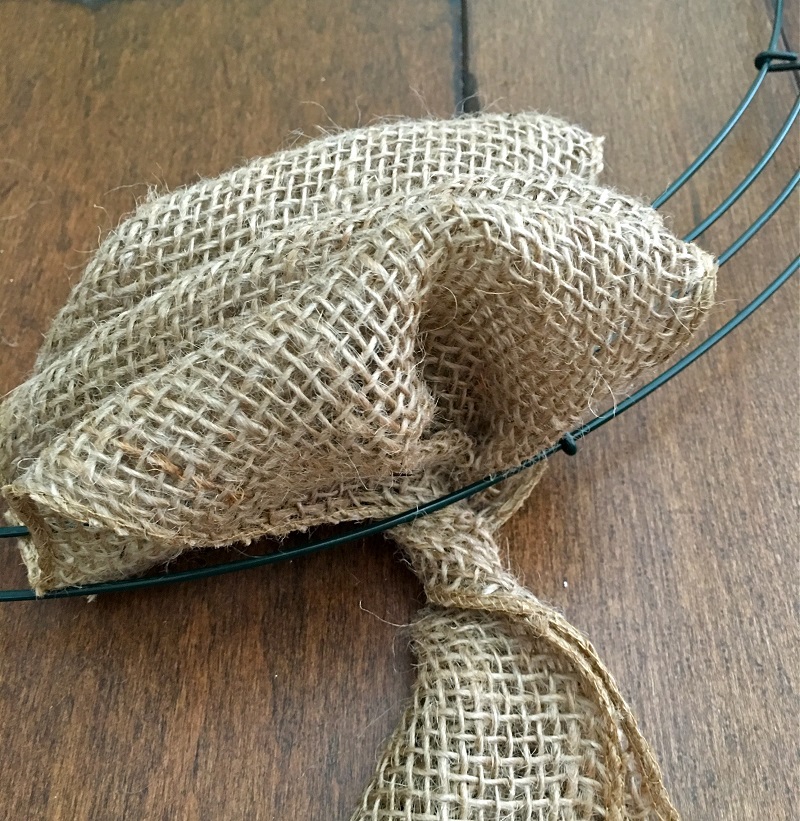
Fold the end of the burlap into quarters and secure to wireframe with a 4” piece of floral wire. Push the floral wire through all layers of burlap and then secure it to the inner ring of the wreath frame.
Bend or cut off any excess wire.
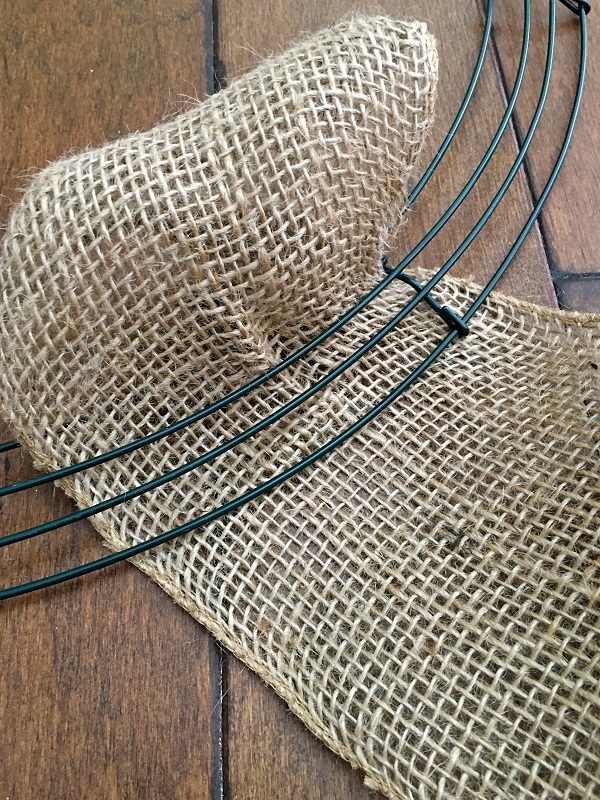
Pull a few inches of burlap through the first inner ring of the wreath. However, you will want the loop to be at least 3” or larger, depending on your preference for this size.
Next, pull the burlap through the middle ring and create a loop. Repeat for 3rd ring, and make sure all loops are the same size.
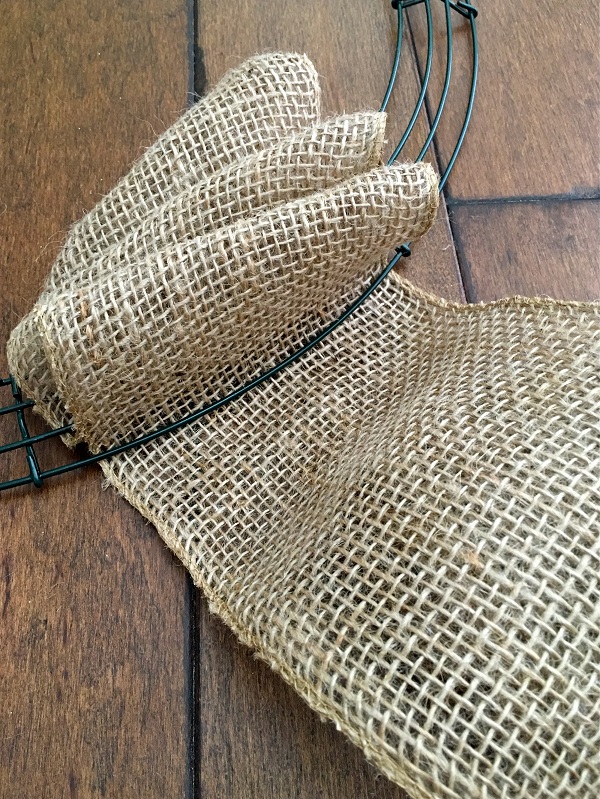
Slide the loops together to one side to make room for new loops. Turn over the wreath and, twist the end of the burlap, hold it tightly.
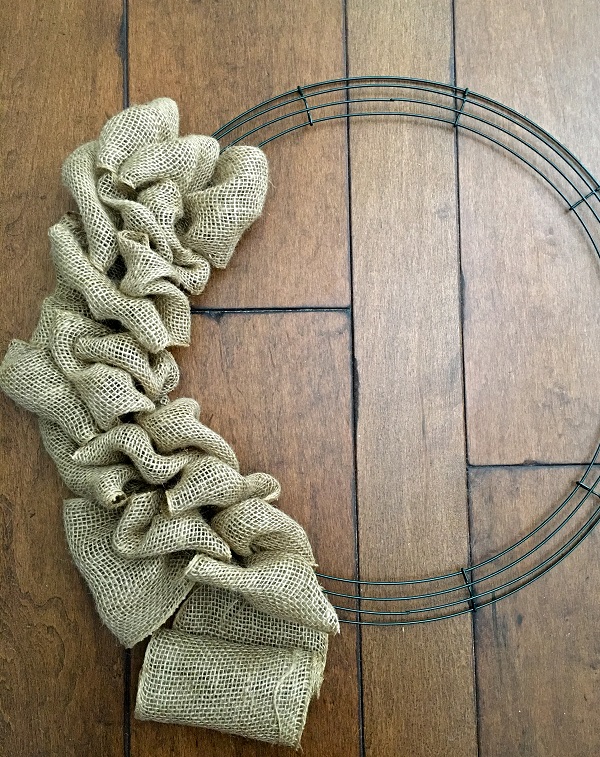
Restart the steps with a new loop on the inner part of the wireframe by pushing the burlap through and creating a loop. Repeat with the 2nd and 3rd rings of the wreath frame.
Keep repeating this process until you have a full wreath. It becomes easier as you go along.
Adjust the wreath to make it look even and full.
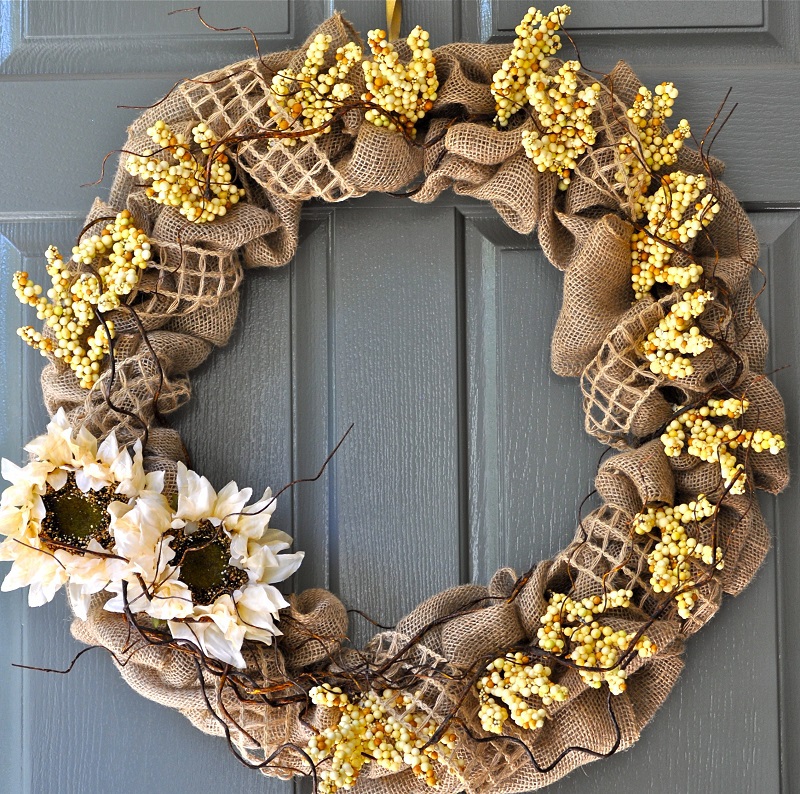
For this wreath, it took 3 rolls of burlap. However, you have the option to make the wreath fuller by creating larger loops. You will want to squish more rows into each section by pushing the burlap together.
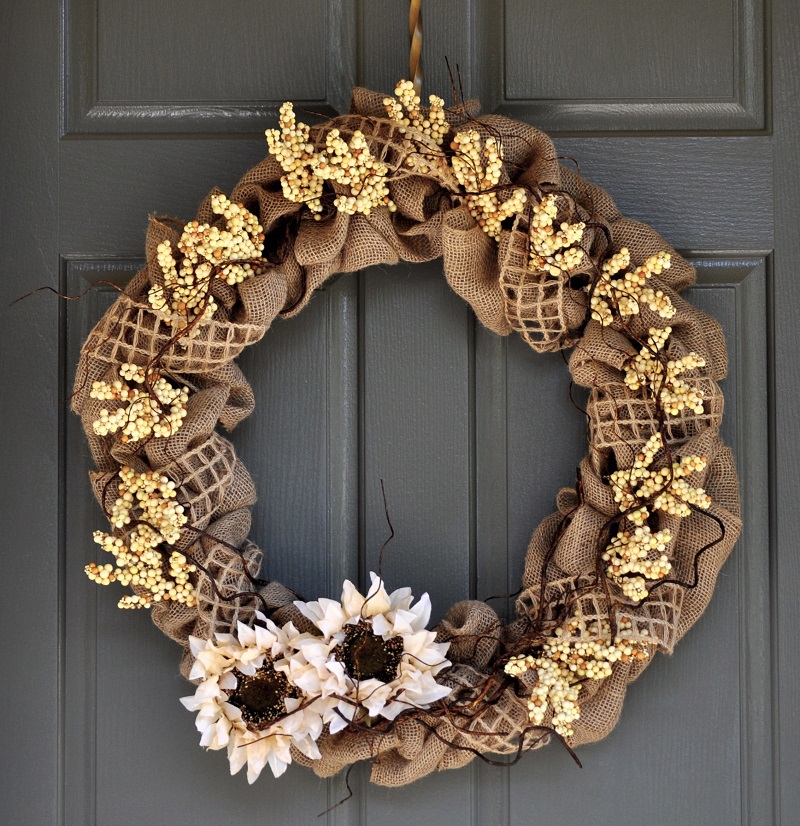
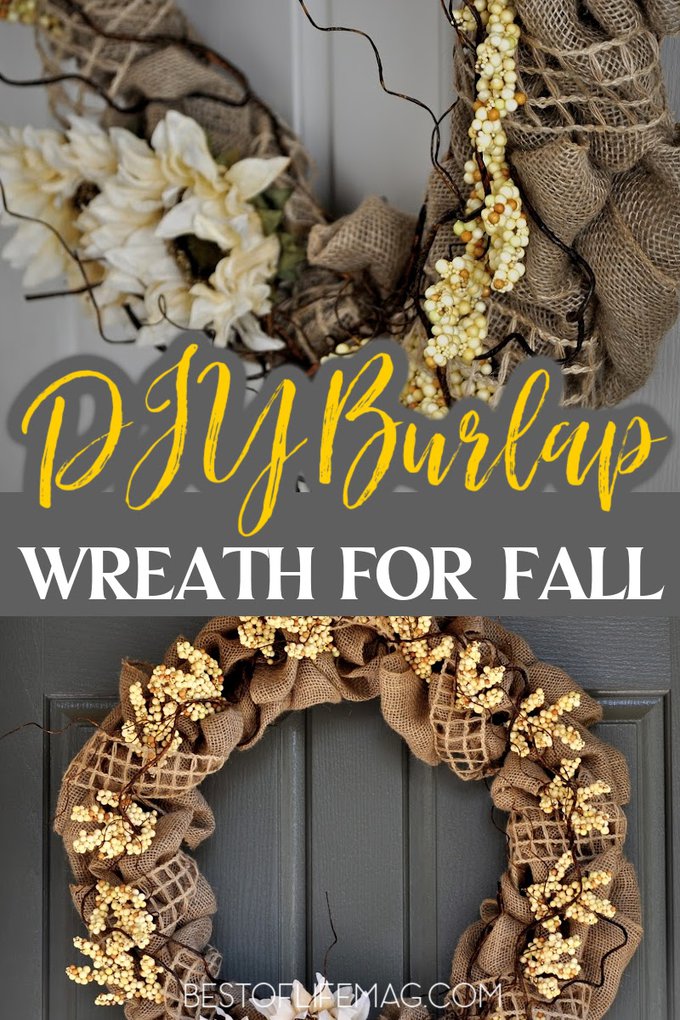
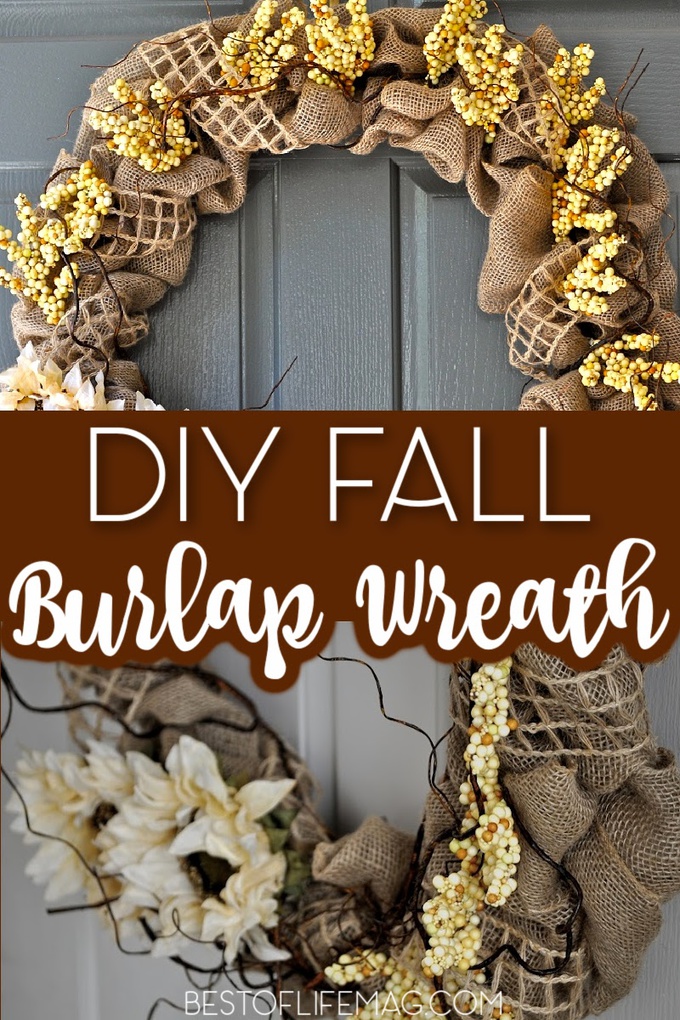
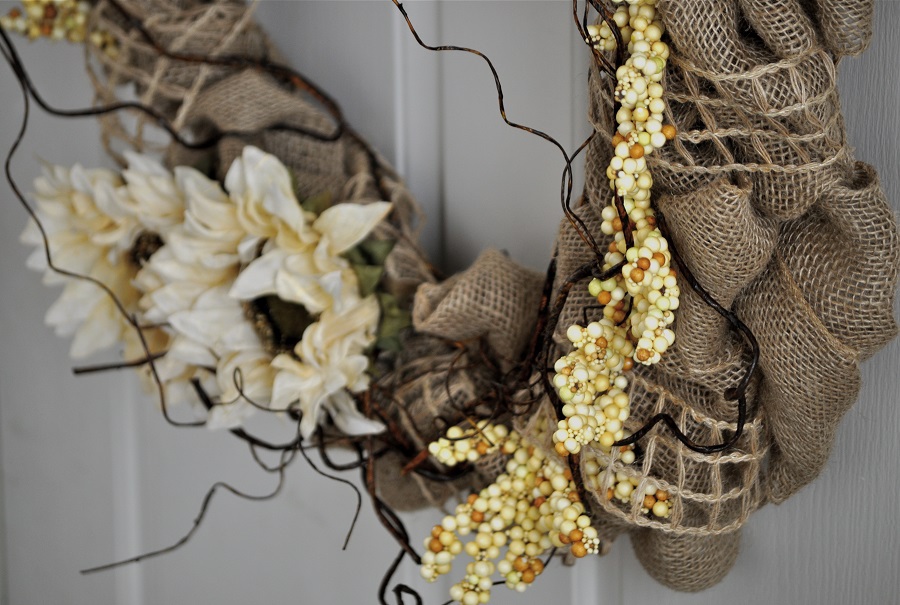
You can decorate the wreath seasonally by adding ribbon, floral accessories, and other fun accents.
It is easy to take apart a floral stem and use it in a way that makes sense. In fact, most of these floral stems are made with wire, which makes it easy to attach to the wreath; you can always attach accessories with floral wire or a glue gun. A burlap wreath is a fun and affordable project to create this fall.
More DIY Projects
DIY Halloween Costumes for Adults | Fall is here, which means Halloween is just around the corner. You can save some money this year by making your own costume.
Halloween Costumes for Kids {Disney, Animals, Fantasy, & More} | Just don’t forget the kids, they will need costumes too for whatever it is they do at night on All Hallows Eve.
DIY Margarita Glasses | There is nothing wrong with having a drink or two in hand while you’re out walking your kids on Halloween. But you can add some style to your drink with a DIY glass.
Wine Cork Wreaths that Make Great Gifts | There are more wreaths you can make for different occasions, some of which will allow you to put those wine corks to good use.
Festive DIY Memorial Day Wreaths | You can even make a patriotic wreath for Memorial Day, 4th of July, or just to show your patriotism for the country that we all share.